
How to automate your files and folders on the Mac
Mac users know how important it is to keep their files and folders organized. With so many documents, photos, and other files, it can be overwhelming to keep track of everything. Luckily, there are a variety of ways to automate the organization of files and folders on the Mac. Here, we're taking a look at FileBot as one of the most convenient and modern options.
Automator
- Difficulty: Medium
One way to automate file organization on the Mac is through the use of Automator. This built-in Mac application allows users to create custom workflows that can be used to organize files and folders automatically. For example, a user can create a workflow that automatically moves all files with a specific file extension to a specific folder. This can be especially useful for keeping all of your pictures in one place, or all of your documents in another.
AppleScript
- Difficulty: Advanced
Another way to automate file organization on the Mac is through the use of AppleScript. This powerful scripting language can be used to create custom scripts that can be used to automate a variety of tasks. For example, a user can create a script that automatically moves all files with a specific file extension to a specific folder. This can be especially useful for keeping all of your pictures in one place, or all of your documents in another.
FileBot
- Difficulty: Easy
FileBot is a powerful and versatile Mac app that allows users to create dynamic automations for their folders. With this app, you can easily build useful workflows to organize your folders, sort documents, cleanup old data, and more. The automations are activated whenever you add a new file, making it a convenient and efficient tool for managing your files.
One of the most impressive features of FileBot is its ability to sort and organize your files automatically. With the app, you can set up rules for how your files should be organized, such as by date, type, or name. This makes it easy to find and access the files you need quickly and efficiently. Additionally, you can use the app to rename your files according to specific patterns, which can save you a lot of time and effort.
Another great feature of FileBot is its ability to cleanup old data. With the app, you can set up automations to automatically delete files that are older than a certain number of days. This can be especially useful for clearing out old documents or files that are no longer needed. Additionally, you can use the app to move files to specific folders, such as a "trash" folder, for easy deletion later.
FileBot also allows you to create custom automations for your folders. This can be especially useful for specific tasks, such as automatically moving files from a specific folder to another location. For example, if you have a folder for photos from your camera, you can set up an automation to automatically move those photos to your "Pictures" folder. Additionally, you can use the app to create custom scripts to perform specific tasks, such as renaming files or moving them to a specific location.
One of the most convenient features of FileBot is its ability to integrate with other apps and services. With the app, you can set up automations to automatically upload files to cloud services, such as Dropbox or Google Drive. Additionally, you can use the app to automatically send files to other apps, such as your email client or a specific folder on your computer. This makes it easy to share files with others or access them from multiple devices.
You can download FileBot here.
User Guide
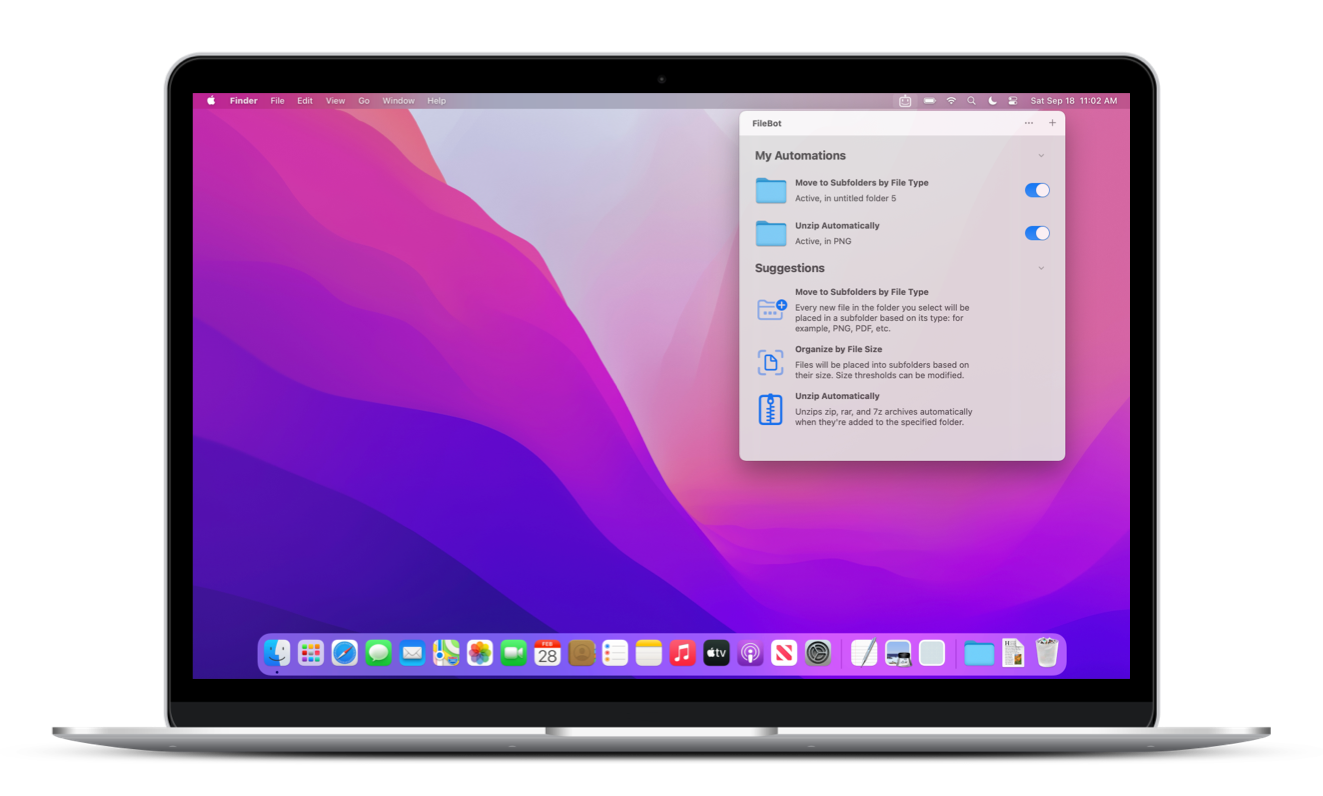
FileBot lets you create dynamic automations for your folders. They will be activated whenever you add a new file. Easily build useful workflows to organize your folders, sort documents, cleanup old data, and more.
Your automations are always accessible from the Menu Bar. Activate one of the existing automations, such as sorting the Downloads folder by document type. Enable, disable, and customize your automations – all from the Menu Bar.
Easily create your own automations right from the Menu Bar. Build your workflows in an intuitive visual manner, or use more advanced features, such as variables and modifiers. You can always learn more about the features available by clicking the help button.
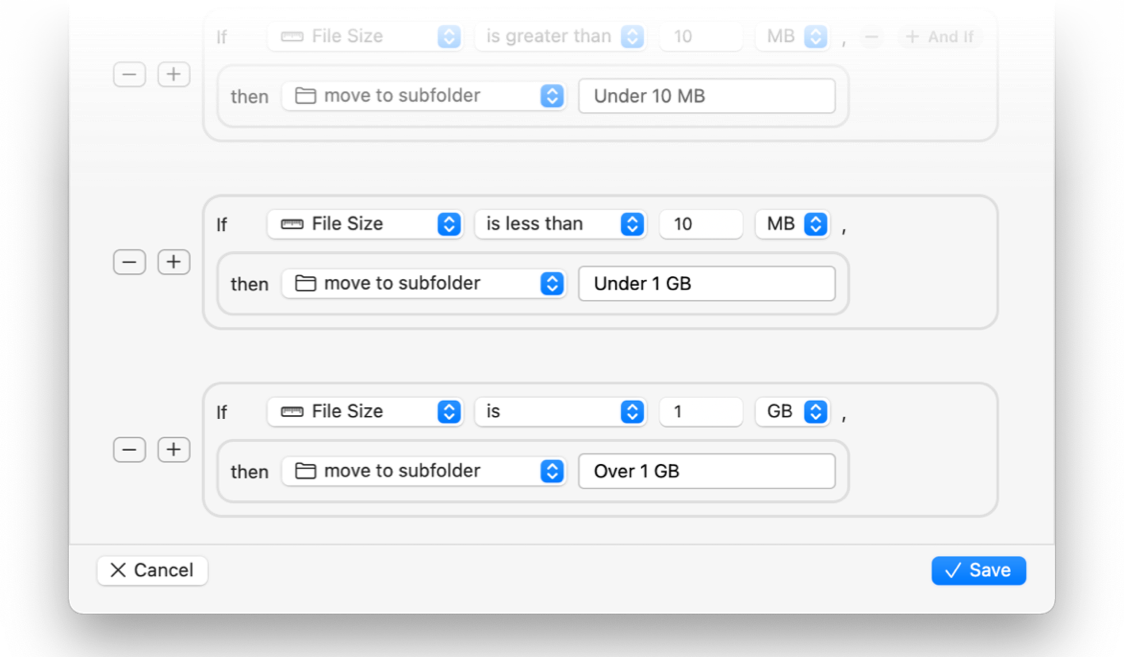
Creating an Automation
Managing Automations
You can manage your existing automations in several ways, giving you even more flexibility with how you can use them.
Activate / Deactivate
Instead of deleting an automation that you might need in the future, you can deactivate it. You will see a switch on the right of your automation when listing them. If the switch appears on, the automation is running. It will keep running as long as you see the app icon in the Menu Bar.
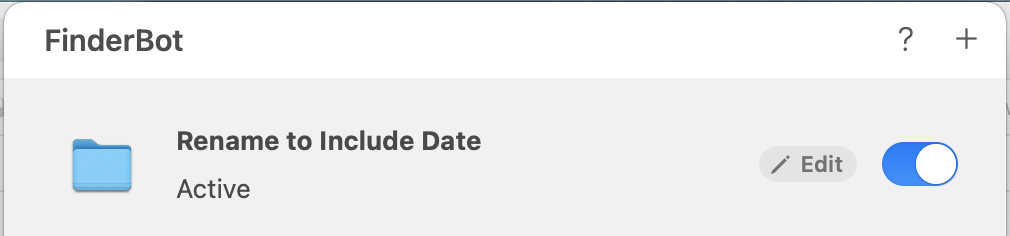
To disable an automation, simply flip the switch. The changes are saved automatically.
Edit
To edit an automation, either click the Edit button by hovering over an item of interest, or right click on an automation you'd like to edit and select Edit from the context menu.
Keep in mind that once you save changes, they will immediately apply to the automation if it's currently active. Changes cannot be reverted.
Delete
All automations are deleted permanently, so be careful. For most cases, you might consider disabling an automation instead.
To permanently delete an automation, right click on the automation you'd like to delete and select Delete from the context menu.
Scripting (Advanced)
When creating actions, it is sometimes useful to know some information about the file, such as its current name, or the state of the automation, such as which conditions were satisfied, or even the global system state, such as the current date.
FileBot supports all those (more advanced) use cases.
Supported Actions
Actions that support scripting: - Rename - Move to folder named - Move to folder (custom)
Getting Started
FileBot contains a convenient autocomplete engine to help you with scripting. Simply type $ into a supported text field (see support above), and see all the supported actions for the given context.
Anything you include within the brackets ${} will be interpreted as a computed value. There are 2 types of values you can use: pre-defined and dynamic computed values.
These computed values will be replaced with the actual values, such as the name of the file for ${name}, when your automation executes. These values may change based on the given file and context.
Autocompletion
To get familiar with the computed values available to you, use autocompletion. If you just type $ into a supported text field, you should see all computed values you can use. Double click on an item or press return while it's selected to automatically fill it in – no need to remember the syntax!
Pre-defined computed values
These are the computed values that do not depend on what conditions you have in the rule. They can be the name of the file being processed (${name}), or the name of the current month (${monthName}).
Here are some examples: - Hello ${monthName} will be replaced with Hello October (depending on the current month, of course). - Today is ${date} will be replaced with Today is 24 October 2021.
Dynamic computed values
These are the values that simply include a number between the brackets. This number refers to the result of a condition at a specific number in the rule (first condition is denoted by 1, second with 2, etc.). This lets you use the result of the execution of that condition within your action.
For example, let's say you have a condition for "file type is," and the value you put into the text field is "pdf, jpg." In other words, the rule will execute if the file type is either pdf or jpg. Let's select "move to folder named" as the action type and enter ${1} in the text field. Don't forget to also select the base folder.
In this example, all pdf and jpg files will be moved to folders named "pdf" or "jpg" within the base folder you specify. Pretty convenient for sorting files into folders by type!
If you had more than one condition, you could refer to them with ${2}, ${3}, etc.
Modifiers
There are several modifiers available to help you build more advanced workflows. You can include a modifier by inserting a period (.) without any whitespace after the computed value. Modifiers can only be applied to computer values, and will not be interpreted otherwise.
For example, these are valid modifiers:
${1}.upper
${name}.lower
But these aren't:
$upper
hello.upper
.upper
Note: chaining modifiers is currently not supported. Any chained modifiers will be interpreted as regular text.